
Cuda Toolkit Installation
In this tutorial, we will be installing a new version of CUDA whilst having another one already installed.
head to Nvidia https://developer.nvidia.com/cuda-downloads to download the desired CUDA version, in this example, we will be installing the latest CUDA version to this date which is 11.7.
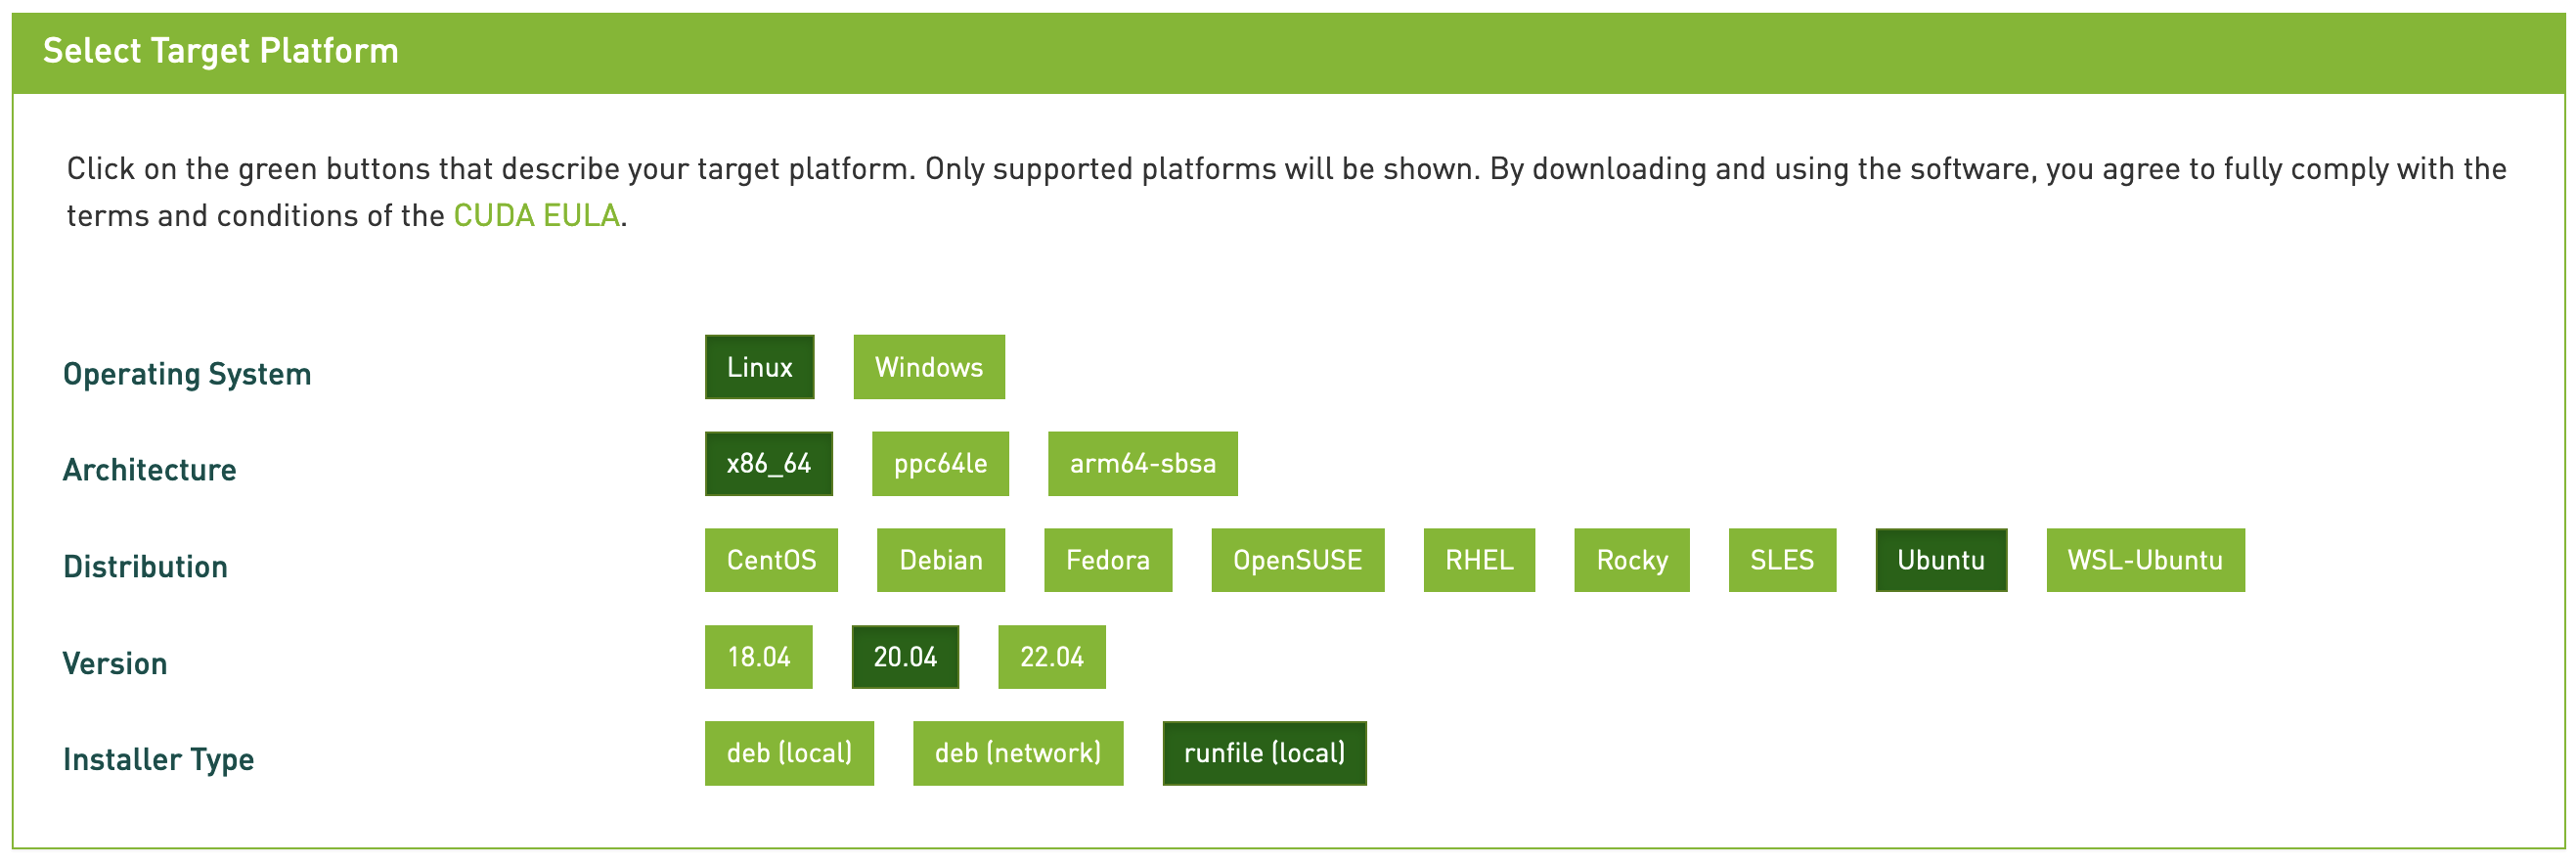
Once you open the installation page, you will get this box to customize CUDA installation based on your system. Let’s go through them one by one.
In this example we will be working on a Linux operating system, so the first option will be Linux.
The second option is for the architecture, if you are not sure what is your system’s architecture, run this command in your terminal:
$ **uname -m**
After that, choose your Distribution. In most cases, it would be Ubuntu, but if you want to double-check, run this command in your terminal:
$ **cat /etc/os-release**
Now check the version of your system by running this command:
$ **lsb_release -a**
And then finally choose the Installer Type to be “runfile (local)”.
Once you choose all of the above options based on your machine’s specifications, two commands will be generated inside the other box:

Run the first command as it is in your terminal and wait for the installer to be downloaded.
$ wget https://developer.download.nvidia.com/compute/cuda/11.7.0/local_installers/cuda_11.7.0_515.43.04_linux.run
Now for the second command, you will have to add 3 more arguments to insure that you override the previously installed CUDA versions. Add –toolkit –silent –override to the end of the second command.
$ sudo sh cuda_11.7.0_515.43.04_linux.run --toolkit --silent --override
Now that you have CUDA installed, we are not yet done, we have to point the system to the right CUDA version.
- in your terminal, run the following:
$ nano .cuda-v
- Inside, add the following: (replace
cuda-11.7with your version)
export PATH="/usr/local/cuda-11.7/bin:$PATH"
export LD_LIBRARY_PATH="/usr/local/cuda-11.7/lib64:$LD_LIBRARY_PATH"
- Then do the following to save and close the editor:
 On your keyboard press the following:

 ctrl + o             --> save
 enter or return key  --> accept changes
 ctrl + x             --> close editor
- Now run the bash script:
$ source .cuda-v
- Finally, check your CUDA toolkit version by running this command:
$ nvcc --version
Congratulations, now you have successfully installed a new version of CUDA!
Atheer Algarni